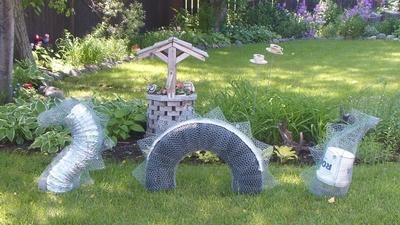
TREEMAN (2004)
Treeman is an upside-down tomato cage covered with several layers of chicken wire. The arms are thin rebar rods covered with chicken wire as just crushed chicken wire would not hold up the weight and he’d be droopy-armed.
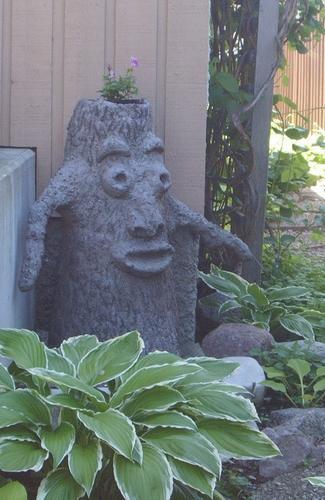
Treemen for other people (cottage, parents, sister)


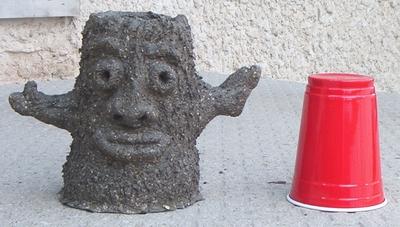
A baby treeman can be made with a plastic beer cup.
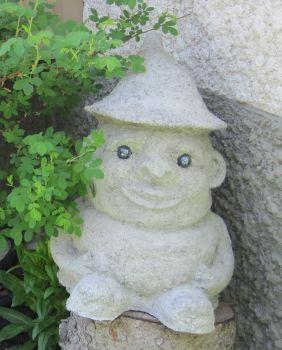
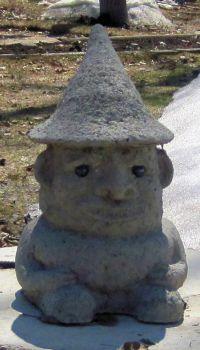
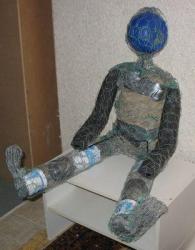
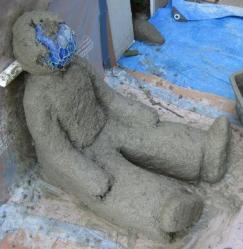
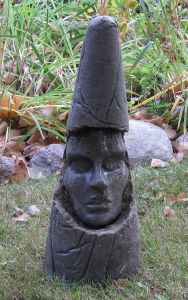
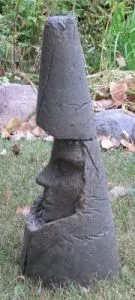
GNOME/LEPRECHAUN (2004)
Even though I made 4 of these, I can’t remember what the base under the chicken wire was… The eyes are large blue-black marbles. I set them in during construction and they have remained intact several years later.
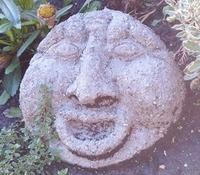
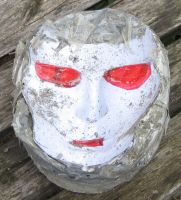
FACE
This was just made because I had leftover tufa mix; I don’t remember if I had a form underneath.
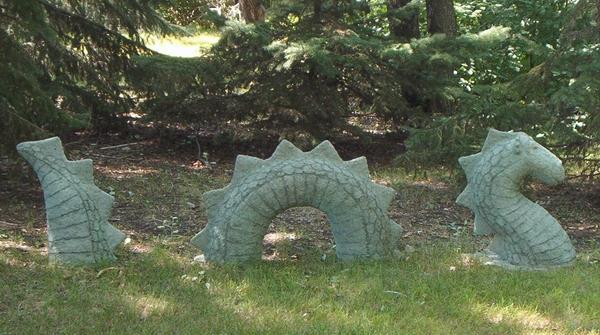
LAKE SERPENT/MANIPOGO – “MIPPIE” (2005)
Neck was dryer vent stuff; tummy a cut tire; tail a 1-gallon bucket. All the rest was the ever-popular chicken wire. The large reels of coated twist ties make good ties for weaving in and out to join pieces together (i.e. back spikes).
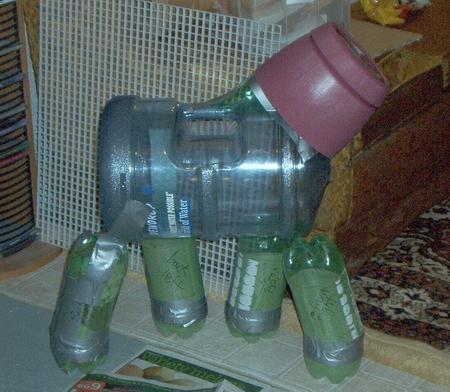
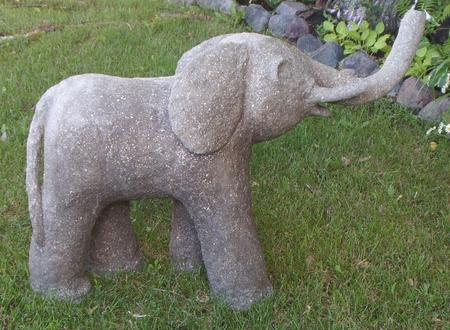
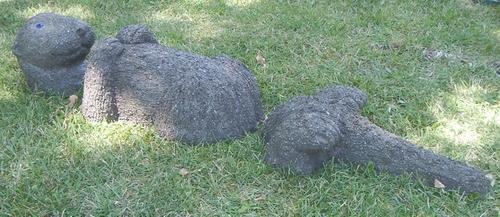
BABY ELEPHANT – “CURSES” (2005)
Named this because that was what I was doing all day while making him. He was fashioned after an elephant paperweight that my dad brought home from work when I was about 5 years old (4-1/2 inches to the top of his trunk). I’ve always loved that paperweight.
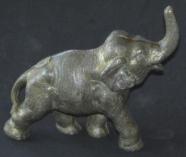 the paperweight
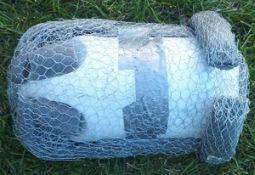
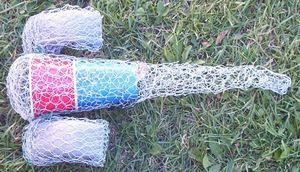
Body was a 5 gallon water jug. A nearby World of Water company had damaged jugs they gave me for free. Legs were each 2x 2L drink bottles joined with duct tape and filled with sand for weight to hold the heavy top part. The head was an old planter. All was covered and the rest formed with chicken wire. Here again, like with Treeman’s arms, thin rebar helps to keep the nose up.
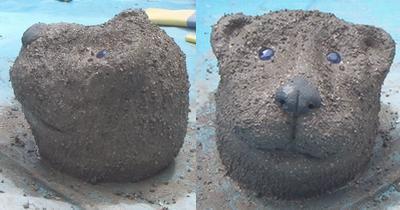
BEAR HEAD
Form was a 907 g margarine container. This was actually my first protoype of an otter head but when it ended up looking more like a bear, I left it at that and gave it to my sister. I then started anew for the otters. The eyes on the bear and the otters are flat blue “marbles” used in vases, etc.
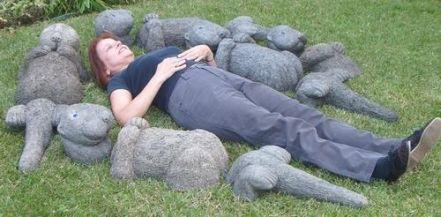
SEA OTTER (2005)
Head (no pic) was a 907 g margarine container. Middle section was a large (3.8L) bleach jug cut flat for the ground; extra filler on the sides and his arms were foam pipe insulation tubes. The feet were foam pipe tubes as well. Tail section was first a plastic beer cup nestled in a slightly smaller plastic cup and then chicken wire. In a more recently made otter, I also used the foam pipe tube for the remainder of the tail length. The last pic with me in the mix is just to show the size. I am 5 feet nothing. (The otter pieces are different colours because some had not been stained yet.)
FISH (2005)
For these, I used a lot of old pool noodle styrofoam.


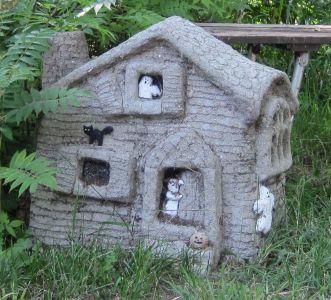
HAUNTED HOUSE (2006)
Form was cut styrofoam. Design idea was from a painted rock picture in one of a series of books by Lin Wellford. I just made the “rock” features 3D.
City house, front, sides and back


Cottage house
STICK MAN (2010)
He was just crushed chicken wire. He turned out pretty bad, hence I’ve named him Ugly Stick Man.
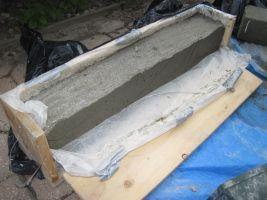
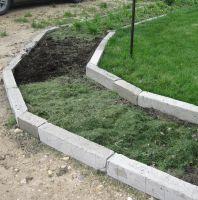
STEPPING STONES & EDGING (2010)
I bought these forms from Lee Valley Tools. In the middle of patting in the tufa mix, I put a double layer of chicken wire.


PLANTERS
The first two were built on the inside of containers. The third was draped. The fourth was formed inside a wicker basket.


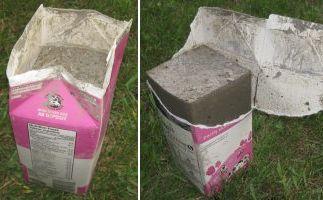
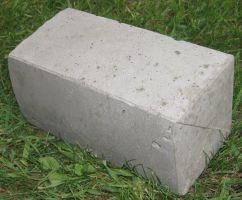
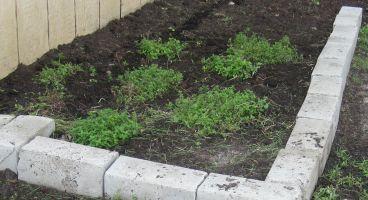
BLOCKS AND BRICKS (2010-12)
My husband made me this great wood block form with a drop-down side to ease removal. It is 2 feet long. For 45 degree angles, my husband also made a wood form I can insert. If I need other angle sizes, I cut leftover floor tiles. In order to save on tufa (ingredients I have to pay for), I put filler inside, which also gives it more weight. For the blocks I use 3 soda cans or 2 water bottles filled with sand. For the 2 Litre milk carton bricks, I use 1 can filled with sand. The milk cartons are one-use only. After the first couple days of setting, the carton is peeled away; it comes off quite freely. The “brick” sides do not lay completely flat but the ends that meet up are fine.
I had been making only blocks for 2 years and bricks one summer. I was thinking how I liked it because it was so much easier. The blocks still interest me, I guess, because I can only make one at a time. One of my sisters-in-law was able to get me 2L milk cartons. She was bringing me 12+ per week. I needed all the bricks but became VERY sick of making them. I then made another otter for somebody and realized that, while harder, sculptures were a lot more satisfying.
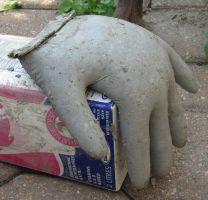
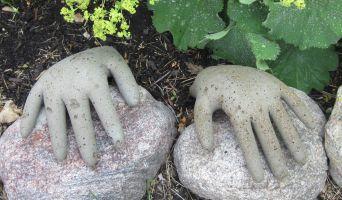
HANDS
These are made using disposable gloves, which I form by hanging them off the edge of my tufa brick milk cartons. Use the biggest size gloves you can find, although these are from “one size fits all”. You want the fingers the biggest that they can be because they are pretty fragile. Put a pin hole in the end of each finger before filling. Try to jam as much tufa mix into the fingers as possible while still being gentle (have had several gloves bust on me during filling). I guess you could use heavier gloves but the trouble with those is you couldn’t see inside to make sure you filled the fingers; I’m not sure if they’d bend as easily either, nor peel off as easily when dry. I let these set at least 5 days before even attempting to gingerly remove the gloves. Broken fingers are a common problem.
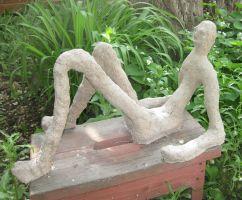
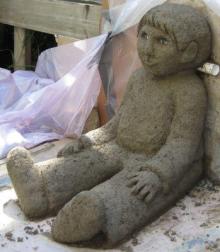
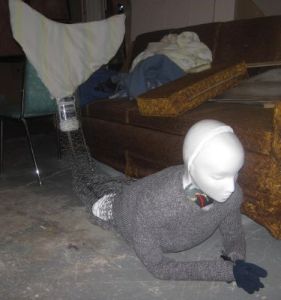
LITTLE BOY – “LU” (2013)
Head is a foam ball with sides sliced off. Tummy is a small polyfilled pillow. Legs are water bottles. Arms are foam pipe insulation tubes (larger ones). Eyes are plastic dolls eyes.
Second pic is sculpting in progress.
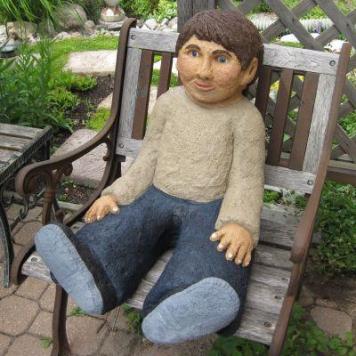
For this project, I bought a small wood carving tool set and carved more details (hair, ears, etc.) after he had set for a day. Four days after sculpting, I removed Lu from his plastic wall. I had built him against this to keep him at the correct angle and to ease the vertical hardening of his back. (Gravity is not your friend in hypertufa sculpting.) Of course this meant that he had a flat head in back (the white plastic bar was for shaping the back of his neck). Since he still was not completely dry, I thought I would try bonding more mix to the back of his head. Research told me I could use Elmer’s carpenter’s exterior wood glue as a bonding agent. I wanted to overdo it because the patch on the back of his head was really quite minimal. I mixed half and half glue and water as my liquid for my hypertufa mix. I also re-wet the back of his head. It seemed to pat on and stay very well. I then re-covered Lu in plastic.
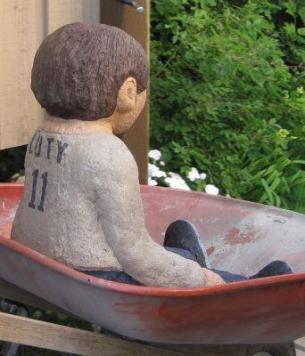
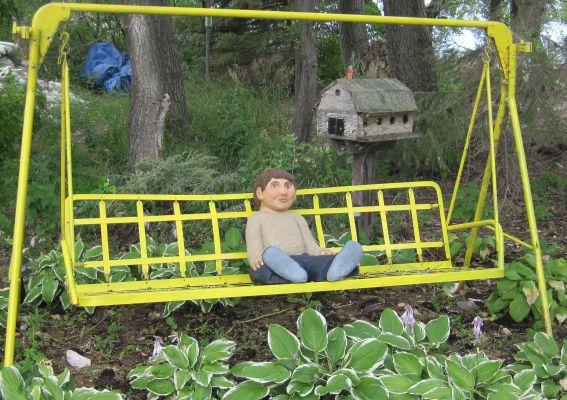
He was also painted. The first picture is finished Lu here in the city. The second one shows the writing on the back of his sport shirt, although it won’t be seen. The last one is Lu at his swinging new home at the cottage.
SLEEPING CATS (2013)
Body base is a microwave dinner tray (Lean Cuisine). Head and hip are fruit cups and bubble wrap was used for body filler.


The next sleeping cats in the series. Why are they all sleeping? So I don’t have to worry about the eyes. Body is a paper bowl (rim trimmed off and stuffed underneath with newspaper/ruined DVDs). Paws, hip filler and head are plastic grocery bags.


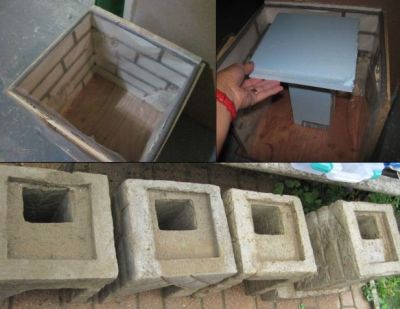
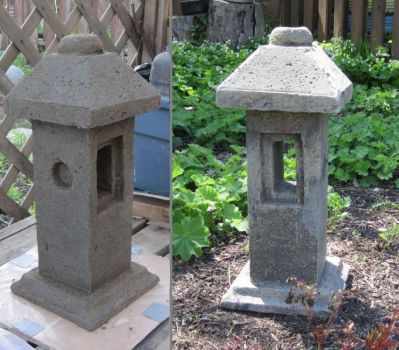
PILLAR (2014)
From the base to the top of the solar light, it is 5 feet tall.
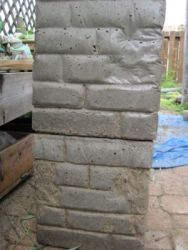
First picture: Each section was made in a cube form (13″) from old particle board shelving. The first section was made with a wider base in which I carved the year and our cottage name. A tunnel and indentation were left for joining the pieces together on site. The bricks were fashioned with thin foam insulating tubing, cut it in half and glue gunned on. Flat stones were used for depressions to make the bricks look worn down in places.
Second picture: After unmolding, I dremeled out more distinct features. This shows the top 3 rows undone compared to balance below.
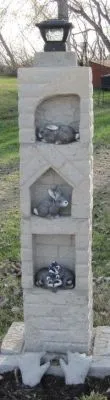
Third picture shows front and back of the finished pillar. Picture was taken shortly after it was put together (Aug.30/14) and before being covered with plastic to cure. The darker bits will dry to the same colour. It was made for a solar light because our original light (along with its pole!) was stolen last year.
Fourth picture taken May 2015 has caves filled with little statues.

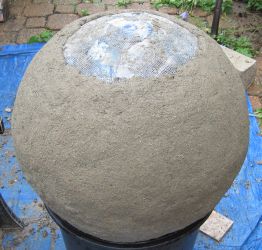
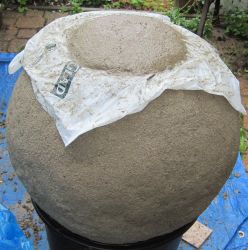
ORB/SPHERE (2014)
Finished orb is 17″ in diameter. It’s hollow but whole: There are hypertufa orbs left with openings for plants or a small water garden but I didn’t want a planter. I also wanted to reuse the form, even if it only cost me $3. Therefore, completely covering it was not an option. So, the following pictures depict my process.
The first picture speeds right to Day 2 because up until here it is the same procedure as instructed on a few places online. (I did find one site that said not to use a beach ball as the mixture would be too heavy but that was for a concrete orb.) I used a beach ball, covered it in Vaseline, then wrapped it with drywall tape. On Day 1, with the beach ball nozzle down, I covered half in hypertufa mixture. On Day 2, I flipped it and covered the second half, leaving an opening to later deflate and take out the ball.
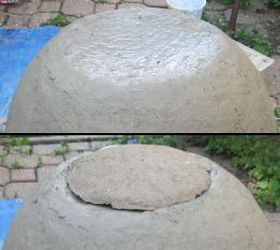
Second picture: A few hours later, on Day 2, when the tufa was set up a bit, I put a piece of plastic over the opening and molded a “cap” slightly smaller than the opening, so that I would have the correct/same roundness of my ball after it was deflated.
Third picture, Day 3: To support my cap, I cut a piece of cotton material slightly larger than my hole and wet it in a slurry as for hypertufa draping (very heavy on the portland cement). It sticks well to the sides and I could place my cap on top. I went back to my regular mixture, slightly wetter than usual. I filled in the gap, covering/tapering past the draping material and joining the pieces together.
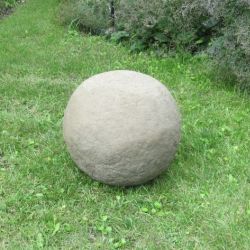
Fourth picture: It is done! It goes without saying, of course, that in between each step, the hypertufa was covered in plastic.
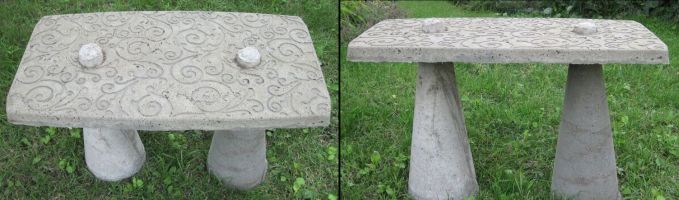
END TABLE (2014)
Molds were a traffic cone, boot tray and Coke cans for holes.
SMALL PILLAR (2015)
This is 18″ tall. Form was made in 3 sections from scrap lumber, wrapped in vapour barrier plastic. It lasted well for five pillars, so far. Circle and window details were styrofoam. The roof and base were made first (with indentations similar to my tall pillar). The indentations were filled and put together when the middle column form was made 1 to 3 days later. The top button was formed inside a fruit cup and added at the same time as the middle column.
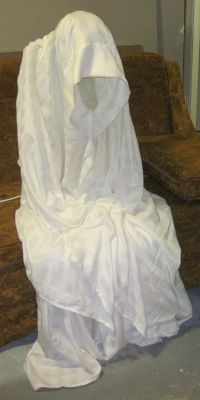
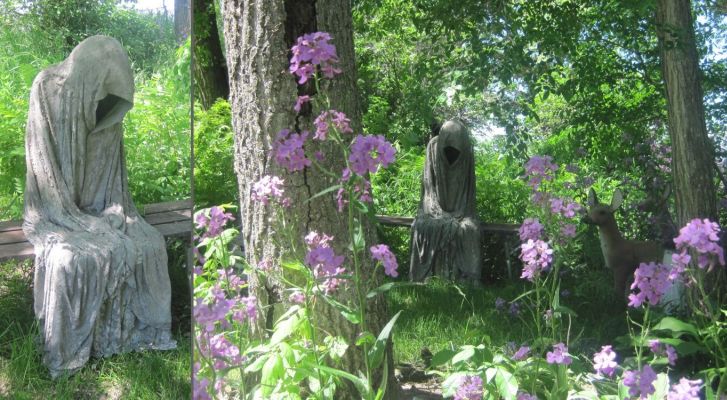
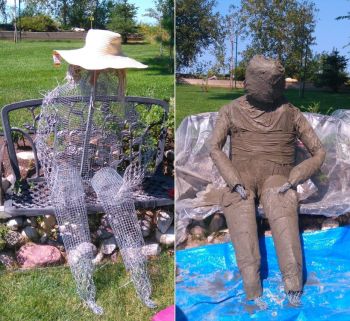
GHOST (2015)
Draped hypertufa. Base body form was an old tall-back chair with the rear legs cut off. The draping was done in 2 sections. I cut 32″ off the bottom of my material which was laid on the seat/lower section, wrapping under the chair a couple inches on each side. The larger piece was placed second, covering the head downwards. I used a double size sheet which, in retrospect, was not such a great idea. For a plain cement slurry it might be fine but hypertufa requires a thicker fabric to set hard enough. A fleece blanket would be a better choice. I did reinforce the interior of my sheet draping with more hypertufa mix. The head was formed with a drywall tape covered balloon attached to the chair top. Again, another mistake. It was sturdy enough as a form but slurry-soaked cloth is HEAVY and as soon as I draped the head, it started drooping. I had to prop it up from the lap with a piece of moulding. So I learned these things but I don’t think I’ll be making another, anyway.
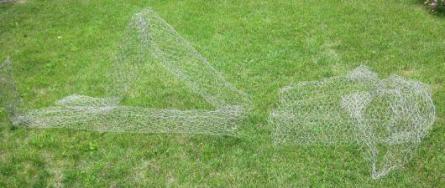
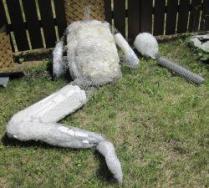
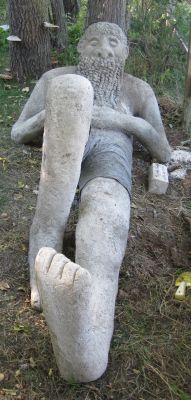
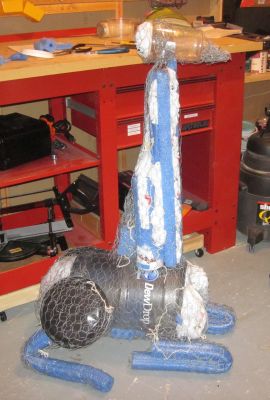
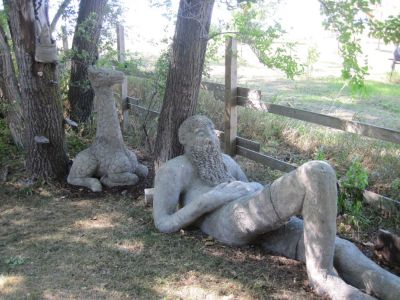
GIANT – “LUG” (2015)
I really liked Ben Gazsi’s eco-sculpture of a Sleeping Giant that I saw online (look it up!). I knew I had to make a giant. I wanted him at the cottage so there was no way I could make him whole at home to transport (never mind the logistics of making such a huge tufa sculpture in one shot). I made him in parts to assemble later, with indentations left on the appendages and chicken wire left sticking out on his torso. The torso was the heaviest part and biggest – it almost didn’t fit in the trunk.
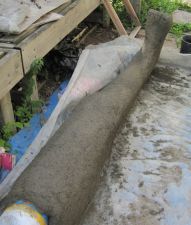
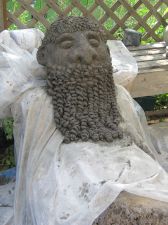
The general shape of my giant was chicken wire (first picture). Then he was stuffed with styrofoam and scrunched up plastic (second picture). I did the legs first (third picture) and then the torso. When the torso was set, I lined it with plastic so I could get the correct positioning of the arms and head and have them removeable when they were set (fourth picture). His hair and beard were soaked in a slurry, as for draped tufa. His hair was microfiber finger cloth. His beard and mustache were crocheted curls (3 double crochets in each chain) placed over a layer of hypertufa mix. I bought his shorts at a thrift store; they had to be cut and laid around his legs rather than pulled on. They were soaked in slurry as for draped tufa.
A time-lapse video of Lug’s assembly.
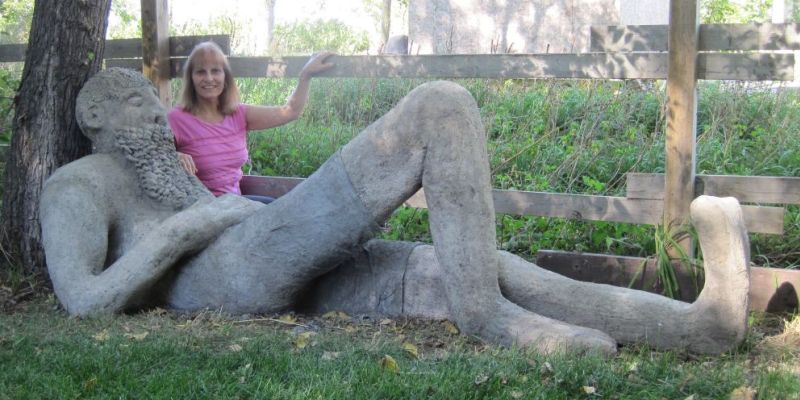
A couple views of Lug the giant, all finished:
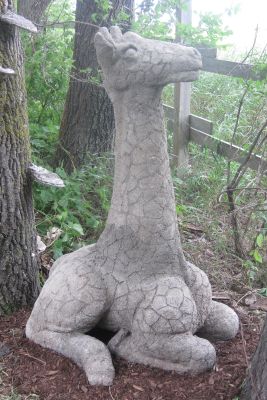
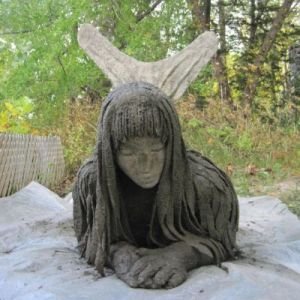
GIRAFFE – “EGGBERT” (2017)
I always had it in mind to make a pet for Lug the Giant but couldn’t think of what it might be. In the winter/spring of 2016/17, I spent a great deal of time online watching pregnant April the Giraffe from Animal Adventure Park in NY. Now I knew the perfect pet! Making him lying down would just be easier. If he stood up, he’d be a bit over 6′ tall – the size of a baby giraffe.
The general main main body was a 5 gallon water jug. The legs and neck were pool noodles; hips were plastic plates; head was a tall plastic food storage container. Spaces were stuffed with plastic grocery bags. He was made in 3 parts: head first, neck second – which were then combined – and third the body. The head/neck and body portions were put together onsite at the cottage. The head/neck had to be secured upright with ropes to the surrounding trees and fence while he was being built and drying.
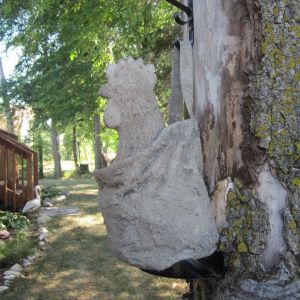
ROOSTER (2017)
It was my husband’s wonderful idea to make a rooster in a sack to go along with my giant and giraffe – my pseudo Friendly Giant trio! Canadians of a certain age group will know The Friendly Giant.
I put together the form one day and made him the next – and forgot to take a picture of the form! His head was balled up chicken wire; his neck a large styrofoam cup and his body a ball. I did not put hypertufa on more than half the ball as he would be in the sack and it would have made him heavier. The sack was a canvas bag I happened to have, which I soaked in a straight cement slurry (not hypertufa). I put a couple plastic grocery bags in the bottom of the bag as filler. I also put a rim of hypertufa around the edge of the ball to the sides of the bag so the unfinished part of the ball wouldn’t be visible.
My “Friendly Giant” trio – rooster, giraffe and giant:
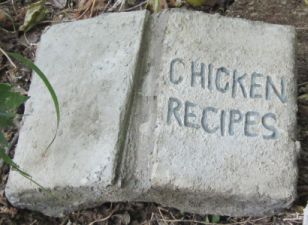
BOOKS (2017)
For my first book, I used an old Reader’s Digest Condensed book, with the leather-like cover removed. At first I tried just soaking the book in plain cement slurry but when it dried, it just flaked off on the page ends. I then covered it with layers of quite wet hypertufa mix, heavier on the front cover because I wanted to etch a title on it. The letters were etched in when it was wet, dremeled when dry and then painted with dark grey Patio Paint.
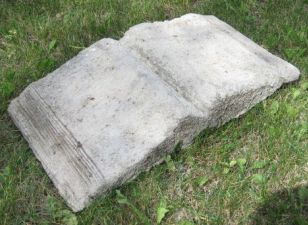
I tried making another book, open side up. I cut out several pages at intervals, coating the remaining ones with slurry and covering all edges with additional mixture. It did not hold up well, again with sections flaking off. I don’t know why I was going to all that trouble; it would be easier to make a book “statue” from scratch. I cut a long, sturdy piece of wire, folded the two ends back towards the center in an arch and built the book out of hypertufa. I squared up the edges and angled the ends with a 1×2. When dried, I scored lines to resemble pages.
CONEHEAD (2017)
This came out of the mold fine; it just wasn’t the look I really wanted. The face was a plastic mask (with holes taped up) set inside a removeable strip (leftover linoleum) and the edges filled with leftover tubes of silicone that I had lying around. The thick silicone took FOREVER to dry. The grey actually was fine but the white silicone never did dry solid and was/still is tacky, so I lined it with packing tape. The mask oval was then put inside a plastic-lined traffic cone. It was flexible to a certain extent so fit against the rounded shape.
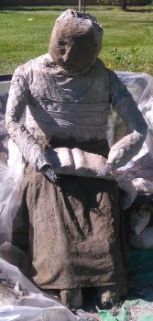
LADY (2017)
The lady was made using a lot of the draped hypertufa method. Her body was shaped with wire. The head, torso and most of her legs were with square-holed wire mesh. It was very stiff and strong to hold her up (especially with the weight of cement soaked cloth, as I learned with the ghost). The arms needed more bending capability. Those and her lower legs were formed with regular chicken wire. Parts were fastened together with cable ties. She was wrapped with rag strips using a heavy cement mix, 7:1:1. (I have previously tried a straight cement slurry but didn’t like working with the consistency. The bit of vermiculite and peat moss gives it more “body”.)
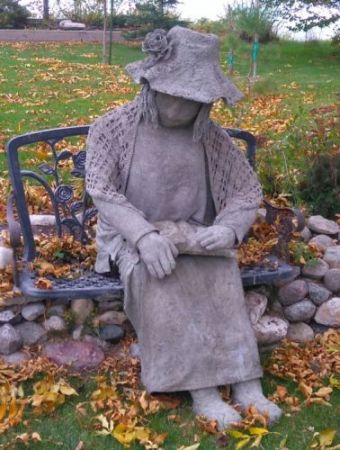
After the mummification, her face was made (wetting previous wrapping, spreading a thinned layer of glue on and with glue in a regular hypertufa mix, 1:1:1). She was dressed with clothes soaked in hypertufa mix (stronger on the cement, 4:1:1). The skirt was put on first, with the already-completed book placed on top. This was allowed to set before continuing another day. The hat and rose were also coated this same day. A hole was left open in the top of her head. Her hands and feet were left until last.
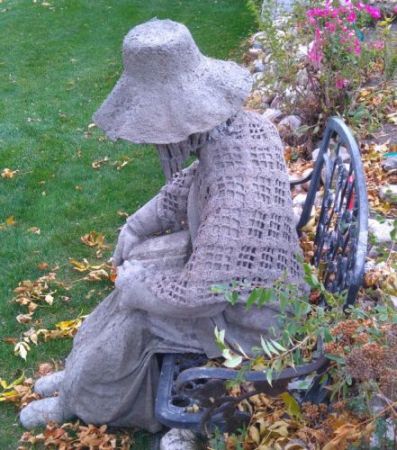
On her final construction day, the sweatshirt was put on – it was able to be pulled up over her arms but was cut straight down the back and pulled around her. The shawl (which I had crocheted) was next and hid the cut shirt on the back. Her hair was the end of a yacht mop. The hole in her head was filled with regular hypertufa mix and the cut stick end of the mop inserted. The crown of the hat was filled with mix and placed on her head. Her hands were cotton gloves and her feet were socks. They were each filled with mix, then inserted over the exposed crunched up chicken wire that had been left. More regular mix was formed around the outside of the sock feet to resemble shoes.
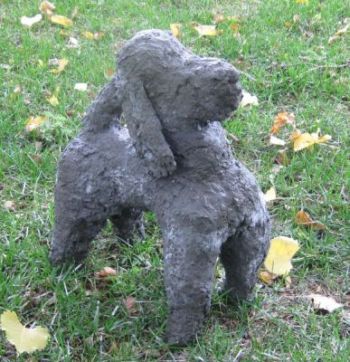
POODLE (2018)
The dog was an old stuffed toy, using a heavy cement mix, 7:1:1.

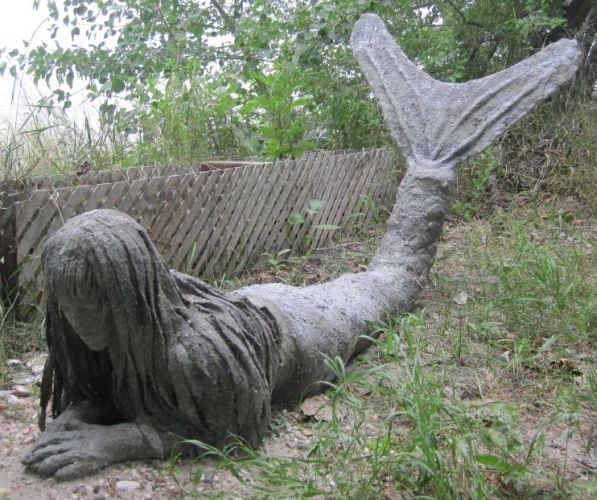
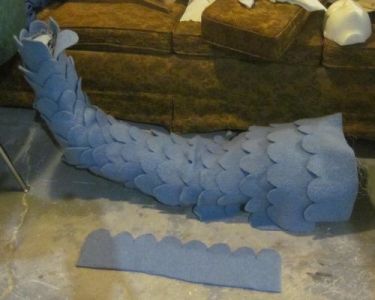
MERMAID – “LUNA” (2018)
The mermaid used both draped and regular tufa construction. She was made in 3 sections: upper body, lower body and tail (although the upper body was assembled in 3 parts as well: face, body and then hair). The tail in the first picture was not the one I ended up using. It was flannel cloth around chicken wire and was too wobbly. In order to make it stiff enough, I would have had to add more layers of cement mix and then it would have been much too heavy. My second tail was 2 layers of heavy felt-like cloth sewn together, soaked in hypertufa mix (stronger on the cement, 4:1:1). It dried lighter and very stiff. The scales also used this proportion of mix.
I found the styrofoam head in a thrift store and made a mold of it with air-dry clay. I left a hollow in the center with scrunched up chicken wire that stuck out, which I later filled/covered and formed the back of her head. There were also 2 lengths of rebar that went from this wire/hollow, down her neck and into her body to hold up the heavy head (learned from the ghost). Her whole head was regular hypertufa mixture (1:1:1). The mold worked well for her face but was only good for a single use, as it absorbed water from the hypertufa mix, was no longer hard and basically crumbled off in pieces when I went to unmold.
The arms were formed with foam insulation tubes. Her hands were finger gloves, filled with regular tufa mixture and then soaked in the stronger (soaking) mixture. Her kelp hair was single layer strands of the same felt material I had used for her tail.
Her tail and face were made first. Second was her lower body, except for the last row of “scales”. Her upper body was made third, at the same time as her face front was attached. A couple days later, her hair put on. On the final construction day, her upper body was attached into her lower body with regular hypertufa mix and the last row of scales was soaked and put on top. Last to be attached was her tail.
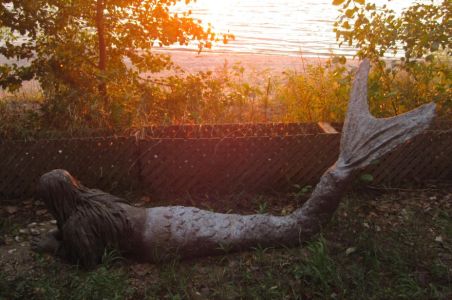
The following year (2019) I sprayed her from the hips down with a whole can of silver sparkle spray paint. The sparkles don’t really shimmer as much as I had wanted but it did make her bottom half lighter (more evident in the sunset picture) and if you look closely, you can see some sparkle happening.